1

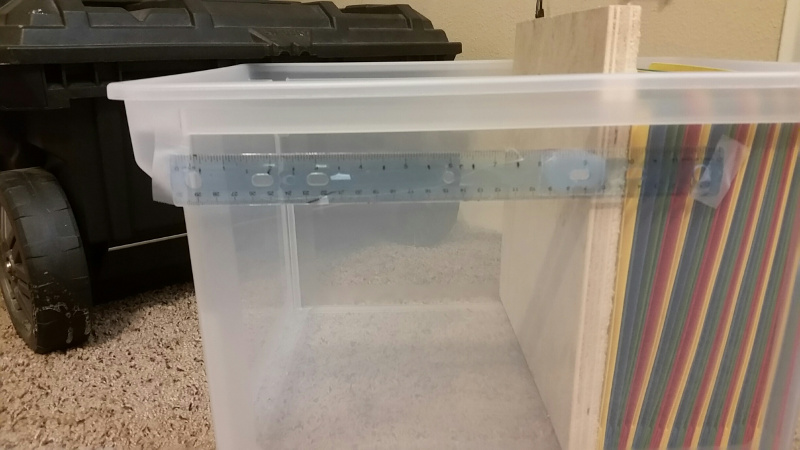
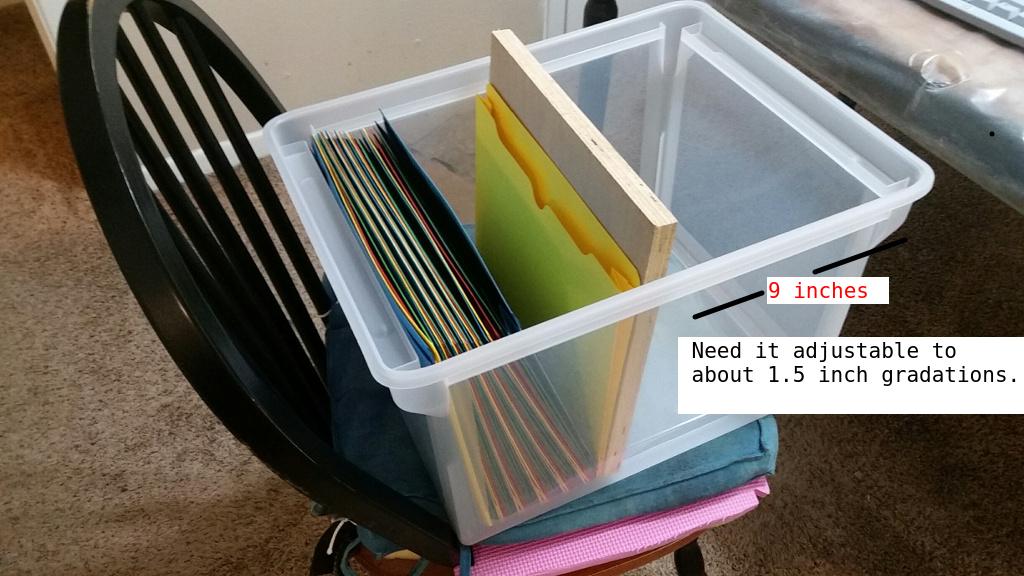
I want to modify this storage container to have adjustable positions for the wooden divider. I do not want to buy any other container, but to modify this one so I can adjust the position of the divider.

I would like it adjustable to about 1.5 inch gradation for the back half of the container. Thanks.

enter image description here

1
  • How often to you need to make adjustments? Commented Jun 19, 2019 at 18:06

3 Answers 3

3

This filing container is built specifically for holding suspended files. In one direction, it is suitable for letter-size file pockets. In the cross-wise direction, it is suitable for legal-size file folder pockets. The smooth second rail molded inside the edges on both sides of the file container allows the suspended pockets to slide forward and backward smoothly. Clear tabs hook into the edge of the pockets for labels.

If you purchase the correct file pockets for the container, you would not need the plywood divider as each file pocket is its own divider. Several folders can be placed in one pocket if desired.

That said, your requested modification is rather simple in theory

As you wish to re-purpose and modify the smooth continuous sliding folders within the container for functioning in steps of 1½ inches, begin by notching the rails in intervals of 1½ inches. This kind of plastic is brittle so care must be taken to avoid shattering and splitting the plastic while you notch it. Grinding may be the best non-destructive way to do this. You'll find the best way.

Notches on the rails should be placed accurately so the plywood divider will hang square and perpendicular to the sides of the storage container.

The plywood plug will need something to fit into the notches so drive a nail on either side partly into the edge of the divider. If the divider is allowed to hang by the nails a fraction of an inch above the bottom of the storage container, its weight will help to stabilize the divider to hang upright. Hanging plywood divider Here's an idealized front and side cut-away view of the divider with a nail placed for hanging from a notch in the rail to prevent sliding inadvertently.
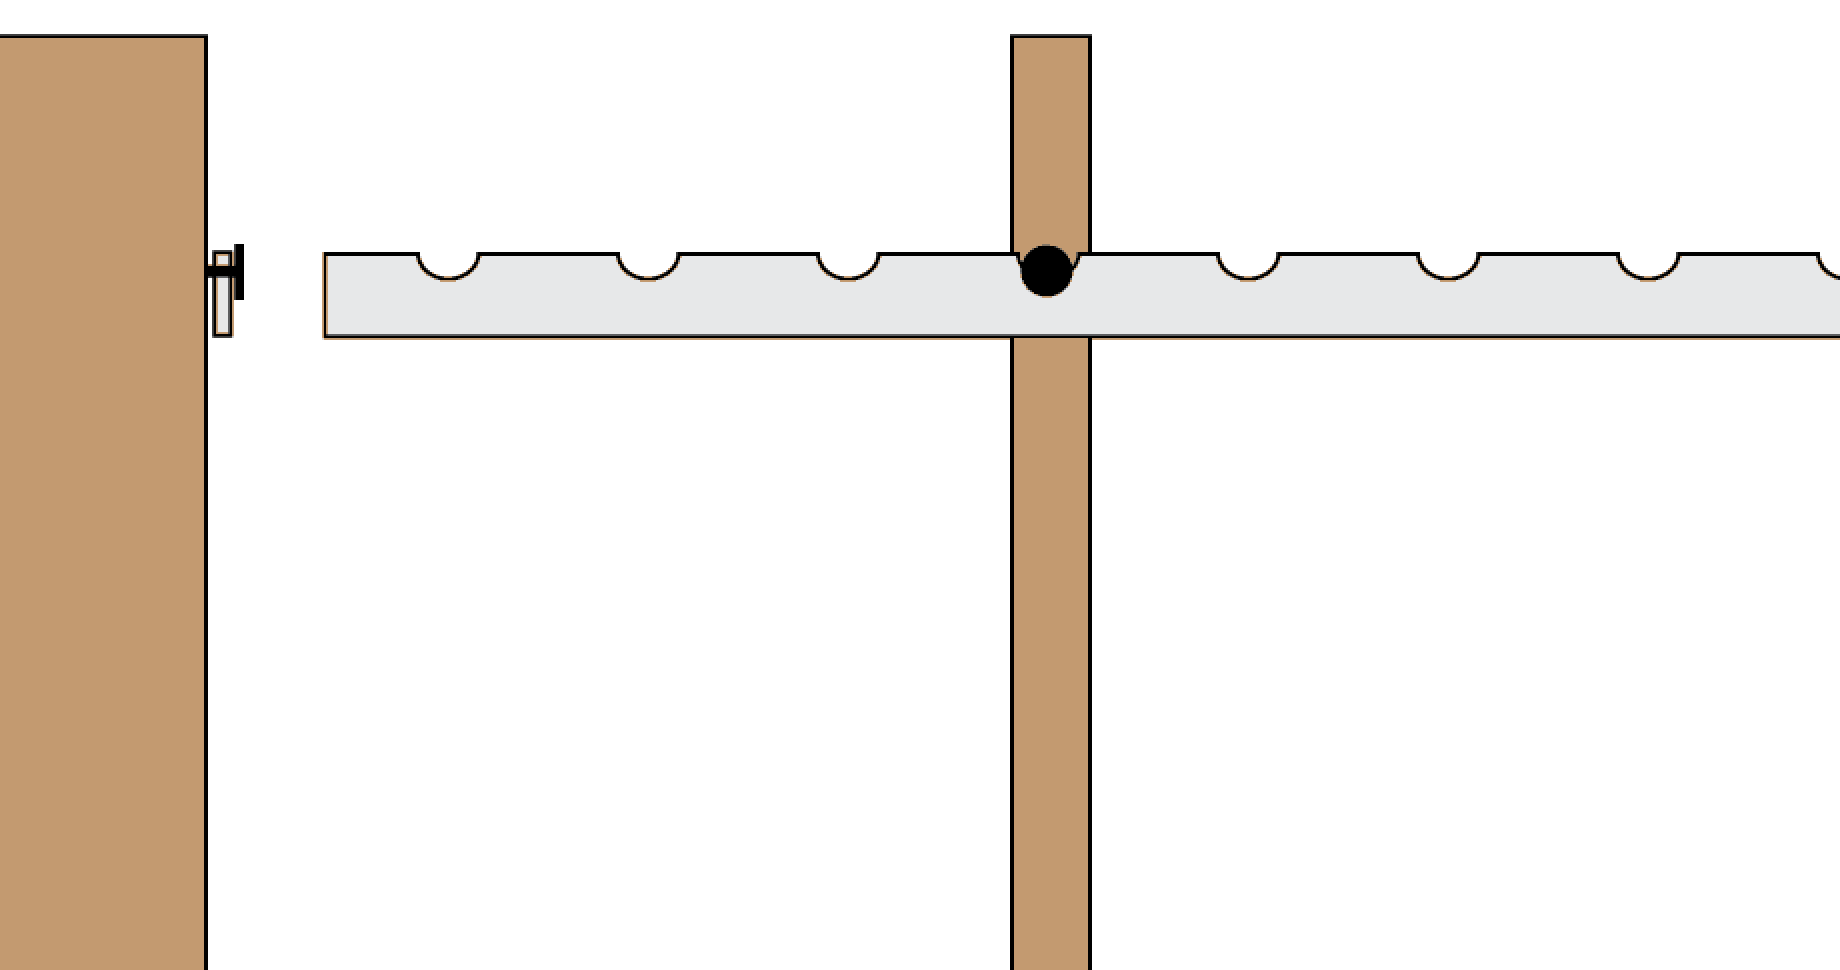
Good luck
3
  • good ideas. I bought 30 of the expanding folders. But the container will accomodate many more. I could add the hanging folders to give more storage for things like product manuals that i keep in a binder. Then i will not have to punch holes in them or put them in pages with pockets where they frequently fall out.
    – fixit7
    Commented Jun 20, 2019 at 8:50
  • 1
    The nails will tend to split the plywood when you hammer them in, so make sure the nails are thin, and also fairly short (maybe 1" or 1-1/2"). You may want to drill a very narrow hole into the plywood on each side first, and lightly hammer the nails into those. Commented Jun 20, 2019 at 11:04
  • There appear to be slots in the plastic you could fit a strip of wood in - its much easier to cut grooves into wood than plastic. Commented Jun 20, 2019 at 13:09
2

You could buy an L-shaped bookend, and bolt the board to it. The crude diagram below shows how this would look from the side.

enter image description here

You could then put the files on top of the horizontal base portion of the L-shaped bookend. Their weight would hold the board upright.

The divider can be moved to any position within the storage container.

If you have fewer files, the base of the bookend may be too long. In this case, just turn it around so the files are on the other side of the board.

You don't need to use an actual bookend. A couple of long corner braces (available at most hardware stores) will work just as well. Add some slip-resistant tape, or hot glue, to the bottom surfaces to keep it in place better.

1
  • Your merhod is easy and fairly quick to assemble. There is about 1/2 inch of space between plywood and the side of the container. I have some thinner wood to make an L-shape to attach to the plywood. Or use some kind of metal. The hot glue is excellent as i have seen it form strong joints. @BrettFromLA
    – fixit7
    Commented Jun 20, 2019 at 8:39
1

I will drill holes in the plastic above the ruler at measured intervals on both sides.

Then drill one hole at the top of the plywood on both sides for the pins to insert into.

I can uses some blunt nails as "pins".

I should only need nails on the top row but can drill them on the bottom if necessary.

enter image description here

Your Answer

By clicking “Post Your Answer”, you agree to our terms of service and acknowledge you have read our privacy policy.

Not the answer you're looking for? Browse other questions tagged or ask your own question.