3

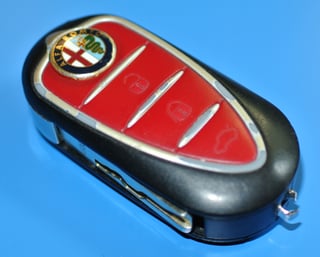
My car-key broke off my key-ring.

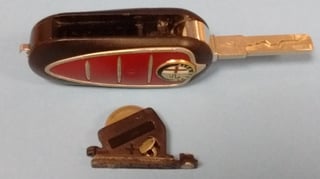
Key fob with broken loop

The small loop at bottom right of photo is broken.

How can I fashion some method of securely attaching this to a key-ring?


Followup to ErinGoBragh's comment:

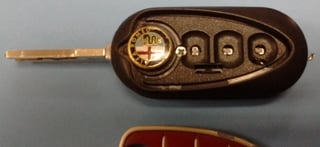
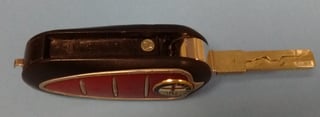
The key (or more accurately the transmitter housing) can't easily be taken apart, the battery is accessed by turning a screw to unlock a battery holder that slides out. I suspect the plastic is glued (or maybe solvent-welded) together.

Fob with battery compartment open Fob with battery compartment open Fob with battery compartment open


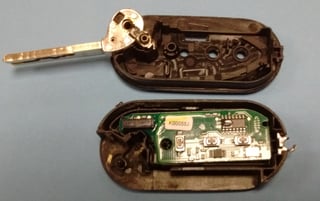
After ErinGoBragh's comment and Tetsujin's answer I dug around a bit more assertively ...

Fob disassembled
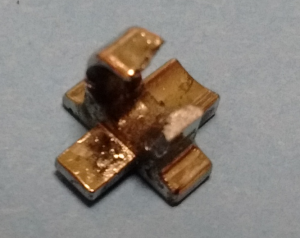
Fob disassembled Broken loop component extracted

Maybe there is some way to make a replacement for this small loop with its cruciform anchor-foot?


I'll probably go with Tetsujin's answer and find a donor for the part. I did briefly ponder bending a paperclip or using sugru/polymorph/epoxy + a screw-eye.

8
  • Will solder stick to the metal? That's the obvious way.
    – Chenmunka
    Commented Nov 18, 2016 at 13:26
  • @Chenmunka Unlikely -- those loops are usually chrome plated cast zinc, aka "pot metal".
    – Zeiss Ikon
    Commented Nov 18, 2016 at 13:36
  • A lot of key fobs (although I am not familiar with this particular model) are designed to be taken apart easily for battery replacement. If this is the case please post a picture of the inside of the fob, we might be able to come up with additional ways to help. Commented Nov 18, 2016 at 15:32
  • @Erin - I have added some photos for the battery compartment. I don't see any obvious way to non-destructively disassemble the thing. Commented Nov 18, 2016 at 15:55
  • 2
    Ah yes, the infamous Alfa Romeo reliability. :) Commented Nov 18, 2016 at 18:19

5 Answers 5

4

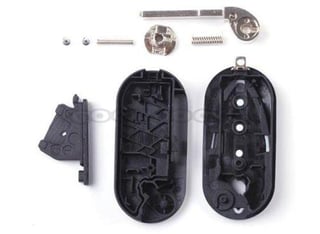
There should be a screw under the emblem - though idk how replaceable that loop is once you get in. It looks like just a small bent piece of metal with an angle at one end & the loop at the other...
though as it's bent rather than cast it might just take solder.

enter image description here

picture from dhgate.com

Or you can get 'blank' keys for 15 quid/bucks/shekels & just swap the guts over to the new one - example

Or... looking at the lack of vital structure at that point, drill it & put a larger ring right through the entire case at approximately the point the loop hooked in; even leave the inner part of the loop for strength/wear resistance & file off the outer part.

Late Edit: - I had another late idea - now you added further pics & I've seen the loop isn't bent metal, but cast.

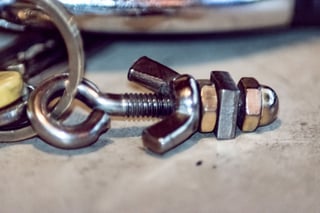
I just thought about what I have attached to my own key-ring. It's purely decorative, meant as a joke, but might hint in the right direction.

A threaded 'eye' outside the housing, with two small square nuts inside, locked against each other.

Sorry the picture isn't great... it's a bit small & it's dark in my workroom right now ;-)

enter image description here

4

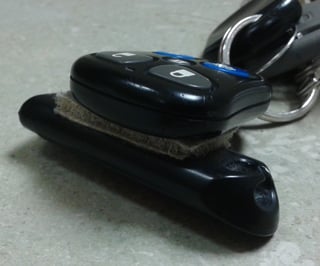
This happened to my thumb drive that I like to carry on my keychain.

I used Velcro strips to affix it to my key fob. Do you have something else on your keychain that you could attach the key to with Velcro? If not, maybe you could add something flat to your keychain to stick the Velcro to.

The adhesive on the Velcro is VERY tacky and the thumb drive has never even thought about coming off the key fob.

enter image description here

0
2

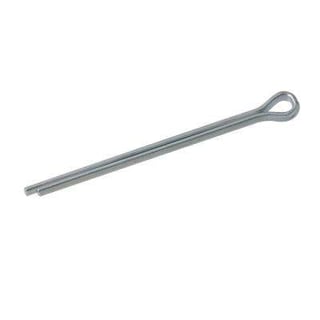
If I wanted to avoid paying for a new case, I would probably try making a replacement for it from a cotter pin:

Cotter pin

You can usually buy a whole bag/case of assorted sizes at the local hardware store for a few bucks, which is good because you'll probably want some extras -- I'd mess up at least twice before I found a shape that worked. You'll also need a couple pairs of pliers to bend it into shape, and something to cut it short with.

It looks like you've got enough space to route a cotter pin replacement further inside the case, making it very unlikely to break or slip out. Just make sure you wrap the end(s) with some electrical tape, so it doesn't short out or scratch the circuit board. I would also consider adding a dab of super glue or hot glue to keep it from jiggling around (once you've tested that it fits, of course).

1
  • Good points about electrical tape and jiggling around! Commented Nov 19, 2016 at 8:06
1

Since you've already extracted the broken part, it would be best to replace it.

I see 2 handy options:

1) Superglue and soda

This is pretty simple - you pour some soda on damaged place, add a drop of super-glue above. It instantly goes pretty deep to the soda. After it's solidified, you file off excesses.

Material is pretty sturdy (good enough for fixing plastic stuff), can take any form and can be done with household stuff (if you have superglue, which is pretty handy in itself). If you are fashioning replacement for the broken part (instead of mending it), you could also reinforce it with a loop of wire, but that is more of a trouble.

2) Wire

With a pair of pliers and some wire you can fashion a replacement. On the upside, it would probably last more than plastic analog. However, that just means that wear would be transferred to its socket, which is plastic just as well (and several years down the road you'd have a glaring hole in that place). So if you go down that route I'd recommend adding some sort of soft washer - plastic, thin rubber, even cardboard or several layers of paper would do.

Due to the same reason - wear transfer - while you could use soldering iron to apply wire patch to the broken loop (if the material melts, not burns), that wouldn't last.

Get yourself some wire roughly around 1mm. (remains of a sparkler, or coil from used notebook or whatever) Thinner or thicker would do just fine, as long as you're able to work with it.

Take a thin pencil, coil the wire tightly around it several times (coil should be as high as the loop, so 2-3mm), leaving several loose ends of couple cm at least. Pull the pencil out.

Now, imagine you're tying a simple knot. Put one loose end of wire trough the loop. If you can, maybe do the same with another too. This is supposed to hold different turns of the coil together. Part of coil that is wrapped around is the part that will be facing outside.

Then, squeeze the coil with pliers. This will make it thin enough to pass through the hole in keychain's body. If you stick a match / toothpick / q-tip middle in the coil, you can make sure that you don't accidently squish it flat. Or simply use the corner of your pliers.

Now you just have to spend some more wire on the part that would anchor the ex-coil inside the keychain, and don't forget some sort of soft washer.

If you find your wire breaking after you bend and un-bend it in the same place several times - heat it red in lighter's flame, this sort of resets the metal.
0

Looks like a GTO 159 key?

Consider simply purchasing a new case and transferring the gubberns over from the old case. Saves the risk of loosing your key again should the repaired one fail suddenly.

An example case would be:

http://www.ebay.com/itm/Fits-for-Alfa-Romeo-Mito-Giulietta-GTO-159-3-BUTTON-REMOTE-KEY-FOB-CASE-BLADE-/222306027717?hash=item33c278c8c5:g:i3AAAOSw44BYHaBd&vxp=mtr

Your Answer

By clicking “Post Your Answer”, you agree to our terms of service and acknowledge you have read our privacy policy.

Not the answer you're looking for? Browse other questions tagged or ask your own question.